Technologies to be used.
- React JS (v.18)
- Vite JS
- TypeScript
- Axios
- CSS vanilla (You can find the styles in the repository at the end of this post)
Creating the project.
We will name the project: axios-react (optional, you can name it whatever you like).
npm create vite@latest We create the project with Vite JS and select React with TypeScript.
Then we run the following command to navigate to the directory just created.
cd axios-reactThen we install the dependencies.
npm installThen we open the project in a code editor (in my case VS code).
code .First steps.
Inside the src/App.tsx file we delete everything and create a component that displays a hello world.
const App = () => {
    return (
        <div>Hello world</div>
    )
}
export default App
The idea is to create 4 different components, and each component will make a type of request (GET, POST, PUT, DELETE). Beforehand I mention that there will be repeated code. If you wish you can refactor, but I will not do it because my purpose is to teach you how to use axios !
We create the folder src/components and inside we create 4 files:
- CreatePost.tsx
- GetPost.tsx
- UpdatePost.tsx
- DeletePost.tsx
🚨 Note: Each time we create a new folder, we will also create an index.ts file to group and export all the functions and components of other files that are inside the same folder, so that these functions can be imported through a single reference, this is known as barrel file .
What is axios?.
Axios is a promise-based HTTP client library that can be used in both Node JS and the browser, so we can configure and make requests to a server and receive easy-to-process responses.
It helps us in sending asynchronous HTTP requests, thus helping us to perform CRUD operations. It is also a good alternative to the default Fetch API of browsers.
Creating a new instance of axios.
First we install axios :
npm install axios Let’s create the src/api folder and create the client.ts file.
Inside the file, we are going to import axios and we are going to create a new instance of axios (most of the time you will always want to do this).
This helps us to have a centralized configuration in one place and customized, since most of the time we don’t want to go around putting the same configuration every time we make a request.
The create property of axios receives a configuration object, where in this case we pass the baseURL property, which is the base url to which we will make the requests.
You can also set the headers, the timeout (number that indicates the time in milliseconds for the request to be aborted), and other properties, but only the base URL is enough for this example.
We are going to use the JSONPlaceholder API to make the requests.
And at once we define, right here, the interface of the response that the API is going to give us.
import axios from 'axios';

export const client = axios.create({
    baseURL: "https://jsonplaceholder.typicode.com/posts"
})

export interface ResponseAPI {
    userId: number;
    id: number;
    title: string;
    body: string;
}
Creating GET request.
First we are going to src/App.tsx and we are going to import all the components that we created previously.
We are going to place first the GetPost and then we will comment it to place the next one and so on.
import { CreatePost, DeletePost, GetPost, UpdatePost } from "./components"

const App = () => {

  return (
    <div>
      <GetPost />
    </div>
  )
}
export default App
Now inside src/components in the GetPost.tsx file, we are going to create a component that is going to display some cards that come from the API.
- First we have a state that stores the posts that will be an array.
- Then, we have the JSX that we only show some texts and we go through the state variable posts and render the information that the API should give us.
import { useState } from 'react';
import { ResponseAPI } from '../api';

export const GetPost = () => {

    const [posts, setPosts] = useState<ResponseAPI[]>([])

    return (
        <>
            <h1>Get Post 👇</h1><br />
            <h2>posts list</h2>

            <div className='grid'>
                {
                    posts.map(post => (
                        <div key={post.id}>
                            <p>Title: <span>{post.title}</span></p>
                            <p>Body: <span>{post.body}</span></p>
                            <p>User: <span>{post.userId}</span></p>
                        </div>
                    ))
                }
            </div>
        </>
    )
}
Then, we are going to create a new folder src/utils where we will create several files, the first one is getData.ts.
To use axios is very simple, we just import the instance we created.
First we create a function, which will be asynchronous and will return a promise that resolves a ResponseAPI array.
export const getPosts = async (): Promise<ResponseAPI[]> => {

}
Now we are going to use the instance of axios, this instance we use the get method that gives us the instance.
import { client, ResponseAPI } from "../api"

export const getPosts = async (): Promise<ResponseAPI[]> => {

    await client.get('')
}
Notice that we execute the get function and inside we put some empty quotes, why?
Well this is necessary to let the instance know that we don’t want to add more parameters to our base URL.
Because at the moment we have the URL like this: “https://jsonplaceholder.typicode.com/posts”, so whatever we add inside the get method (or any other method) will be concatenated to this URL .
That’s why we only put single and empty quotes referring to the fact that we don’t want to concatenate anything.
But if we want to concatenate something like for example the limit of results of the API we will place it in the following way:
import { client, ResponseAPI } from "../api"

export const getPosts = async (): Promise<ResponseAPI[]> => {

    await client.get('?_limit=6')
}
Now, this promise returns an object that contains several properties such as the configuration, the headers, the state of the request, among others, but the one that interests us is the data property. The data property is what we are going to return, because that is where the API response will come from.
Note that the get method is also typed with ResponseAPI[], just in case, and even if you don’t type it and return the data, it will work because the default data property is of type any.
import { client, ResponseAPI } from "../api"

export const getPosts = async (): Promise<ResponseAPI[]> => {

    const { data } = await client.get<ResponseAPI[]>('?_limit=6')
    return data
}
That’s how easy it is to make a GET request.
Now returned to src/components/GetPost.tsx.
We implement an effect to make the API call (in this occasion we will do it like this, although it is recommended to use a library to handle the cache of the requests like React Query).
Inside the effect we execute the function getPosts and we solve the promise to later establish the data that returns us this promise.
import { useState, useEffect } from 'react';
import { ResponseAPI } from '../api';
import { getPosts } from '../utils';

export const GetPost = () => {

    const [posts, setPosts] = useState<ResponseAPI[]>([])

    useEffect(() => {
        // You can implement a <Loading/>
        //  start loading
        getPosts().then(data => setPosts(data))
        //  finish loading
    }, [])

    return (
        <>
            <h1>Get Post 👇</h1><br />
            <h2>posts list</h2>

            <div className='grid'>
                {
                    posts.map(post => (
                        <div key={post.id}>
                            <p>Title: <span>{post.title}</span></p>
                            <p>Body: <span>{post.body}</span></p>
                            <p>User: <span>{post.userId}</span></p>
                        </div>
                    ))
                }
            </div>
        </>
    )
}
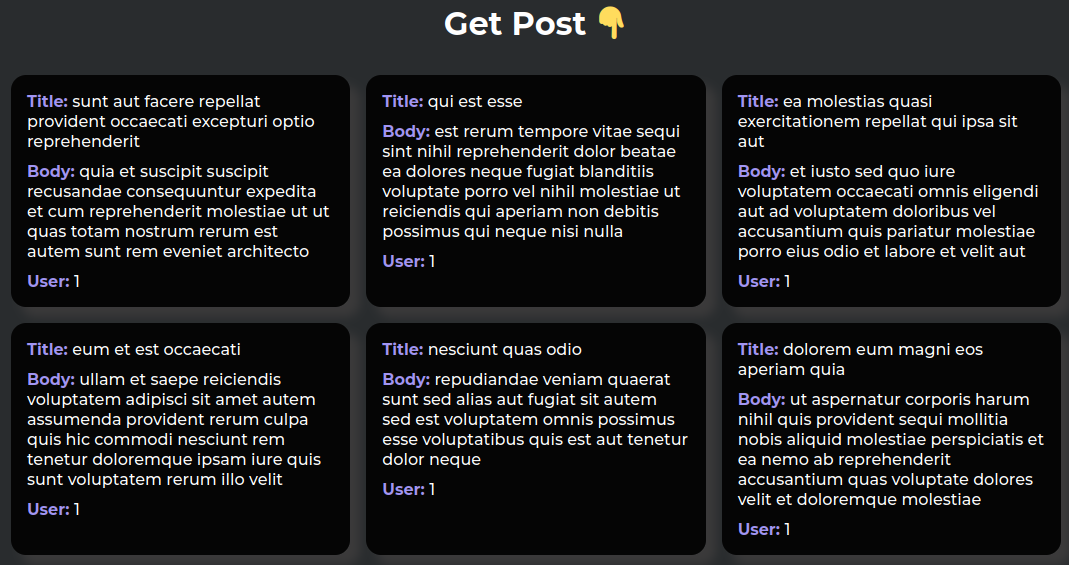
And this is what the rendered API data would look like
Creating POST request.
Now we go to the src/components/CreatePost.tsx file and create a new component similar to the previous one.
This component renders the same list of posts and stores them in a state as well.
Note that the key, at the moment of going through the state of posts, is post.userId because this is the only value that is different when we create a new post.
Also note that a button was added, to create post, we will do it without a form, but the best thing would be to receive the values by a form.
This button, in its onClick event executes the handleClick function, which at the moment does nothing, but that is where we have to execute the method to create a new post.
import { useState } from 'react';
import { ResponseAPI } from '../api';

export const CreatePost = () => {

    const [posts, setPosts] = useState<ResponseAPI[]>([])

    const handleClick = async () => {}

    return (
        <div>
            <h1>Create Post 👇</h1>
            <button onClick={handleClick}>Add Post</button>

            <div className='grid'>
                {
                    posts.map(post => (
                        <div key={post.userId}>
                            <p>Title: <span>{post.title}</span></p>
                            <p>Body: <span>{post.body}</span></p>
                            <p>User: <span>{post.userId}</span></p>
                        </div>
                    ))
                }
            </div>
        </div>
    )
}
Next, let’s create a new file in src/utils named createPost.ts .
Inside the file we create a new function that will return a promise resolving a single ResponseAPI. And also, this function receives some parameters that are necessary to create a new post.
import { client, ResponseAPI } from '../api';

export const createPost = async (title: string, body: string, userId: number): Promise<ResponseAPI> => {

}
Inside the function we call the instance and execute its post method, which also gives us access, once the promise is resolved, to the data object.
Note that we must also indicate if it needs to be concatenated to the base URL or not, in this case no, so we only place empty quotes.
import { client, ResponseAPI } from '../api';

export const createPost = async (title: string, body: string, userId: number): Promise<ResponseAPI> => {
    const { data } = await client.post('')
    return data
}
But the post method not only receives the URL, but also needs the body or the data to send to create new information. So that body, we pass it as a second parameter, in an object.
import { client, ResponseAPI } from '../api';

export const createPost = async (title: string, body: string, userId: number): Promise<ResponseAPI> => {
    const { data } = await client.post('', { title, body, userId })
    return data
}
Ready, we have our function to create a new post, now we are going to use it in src/components/CreatePost.tsx.
In the handleClick function we call the createPost function and pass it the necessary parameters. We use async/await to resolve the promise returned by the createPost function, which if everything is correct, should return a new post.
This new post, we are going to add it to the state, keeping the previous posts.
import { useState } from 'react';
import { ResponseAPI } from '../api';
import { createPost } from '../utils';

export const CreatePost = () => {

    const [posts, setPosts] = useState<ResponseAPI[]>([])

    const handleClick = async () => {
        const newPost = await createPost("new title", "something", Date.now())
        setPosts(prev => ([newPost, ...prev]))
    }

    return (
        <div>
            <h1>Create Post 👇</h1>
            <button onClick={handleClick}>Add Post</button>

            <div className='grid'>
                {
                    posts.map(post => (
                        <div key={post.userId}>
                            <p>Title: <span>{post.title}</span></p>
                            <p>Body: <span>{post.body}</span></p>
                            <p>User: <span>{post.userId}</span></p>
                        </div>
                    ))
                }
            </div>
        </div>
    )
}
We probably won’t see anything, but remember to comment out the old component and place the new one, in src/App.tsx.
import { CreatePost, DeletePost, GetPost, UpdatePost } from "./components"

const App = () => {

  return (
    <div>
        {/* <GetPost /> */}
        <CreatePost/>
    </div>
  )
}
export default App 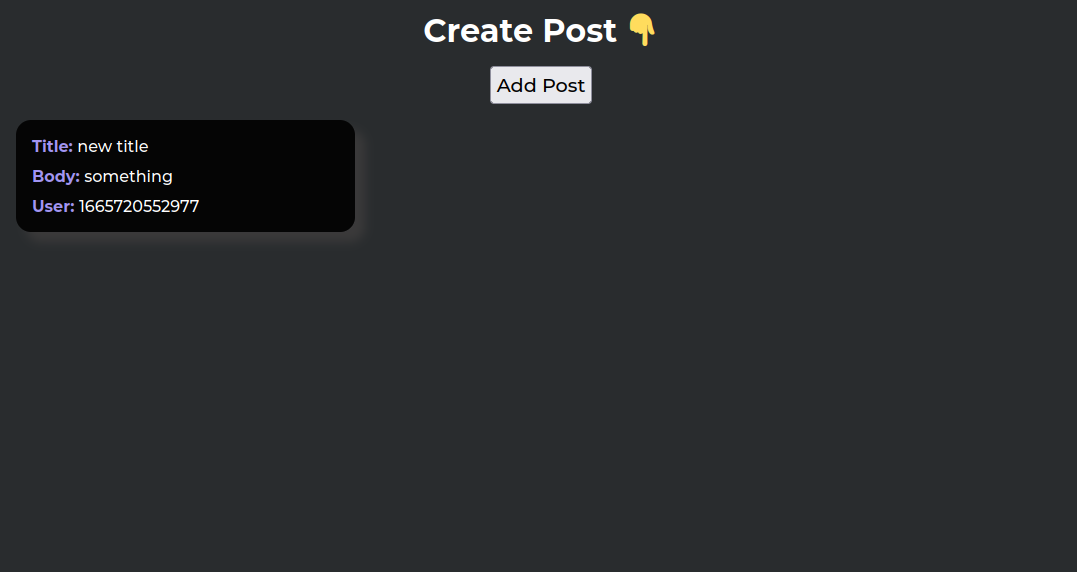
Creating PUT request.
First we will change the component in src/App.tsx.
import { CreatePost, DeletePost, GetPost, UpdatePost } from "./components"

const App = () => {

  return (
    <div>
        {/* <GetPost /> */}
        {/* <CreatePost /> */}
        <UpdatePost/>
    </div>
  )
}
export default App
Then we go to src/components/UpdatePost.tsx to create a new functional component that is the same as GetPost.tsx . since we need a list of existing posts in order to update any of them.
Note that the div that is rendered when scrolling through the posts:
- Has a className=‘card’ .
- It has an onClick event that executes the handleUpdate function and we send it the id of the post as a parameter.
The function handleUpdate is asynchronous and receives the id of the post that is of type number, and at the moment it does not execute anything.
import { useState, useEffect } from 'react';
import { ResponseAPI } from '../api';
import { getPosts } from '../utils';

export const UpdatePost = () => {

    const [posts, setPosts] = useState<ResponseAPI[]>([])

    useEffect(() => {
        getPosts().then(data => setPosts(data))
    }, [])

    const handleUpdate = async (id: number) => {}

    return (
        <div>
            <h1>Update Post 👇</h1><br />
            <h2>Click a card</h2>
            <div className='grid'>
                {
                    posts.map(post => (
                        <div className='card' key={post.id} onClick={() => handleUpdate(post.id)}>
                            <p>Title: <span>{post.title}</span></p>
                            <p>Body: <span>{post.body}</span></p>
                            <p>User: <span>{post.userId}</span></p>
                        </div>
                    ))
                }
            </div>
        </div>
    )
}
Then, we go to src/utils and create a new updatePost.ts file.
Where it is basically almost the same as the post method.
Note that now the function parameters are defined in an interface.
The only difference between the post and the put is that in the URL if we have to place a new parameter that is the id of the post that we want to modify.
import { client, ResponseAPI } from '../api/client';

interface Props {
    id: number,
    userId: number,
    body: string,
    title: string
}

export const updatePost = async ({ id, body, title, userId }: Props): Promise<ResponseAPI> => {
    const { data } = await client.put(`${id}`, { body, title, userId })

    return data
}
Now we are going to use our function, in src/components/UpdatePost.tsx.
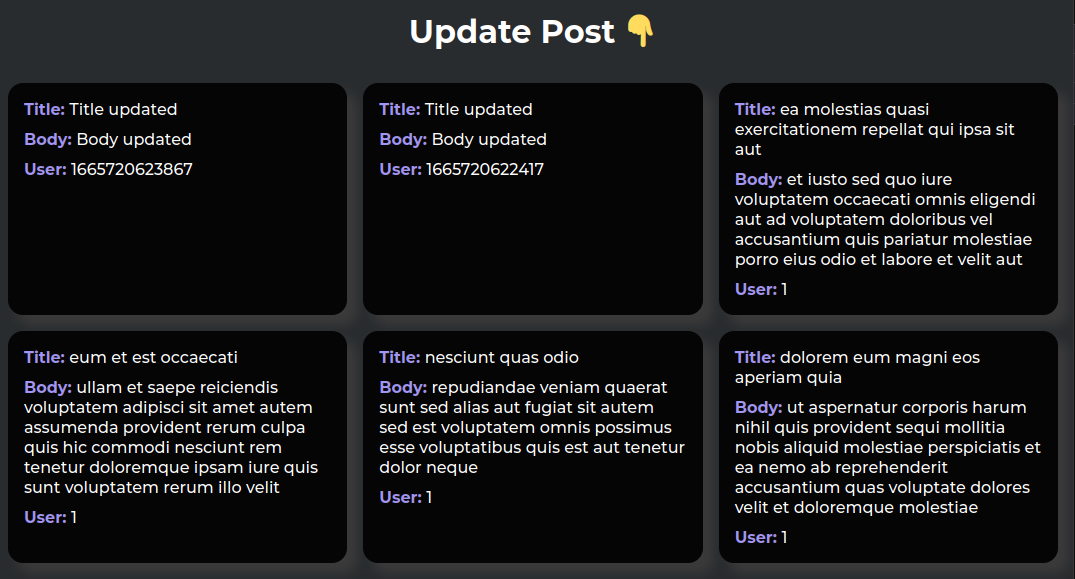
In the handleUpdate function we call the updatePost function and pass it the necessary parameters, again we use async/await to resolve the promise and get the updated post.
Finally we set a new state, placing the updated post.
import { useState, useEffect } from 'react';
import { ResponseAPI } from '../api';
import { getPosts, updatePost } from '../utils';
export const UpdatePost = () => {

    const [posts, setPosts] = useState<ResponseAPI[]>([])

    useEffect(() => {
        getPosts().then(data => setPosts(data))
    }, [])

    const handleUpdate = async (id: number) => {

        const body = `Body updated`
        const title = `Title updated`
        const userId = Date.now()

        const postUpdated = await updatePost({ id, body, title, userId })

        setPosts(prev => ([
            postUpdated,
            ...prev.filter(post => post.id !== id),
        ]))
    }

    return (
        <div>
            <h1>Update Post 👇</h1><br />
            <h2>Click a card</h2>
            <div className='grid'>
                {
                    posts.map(post => (
                        <div className='card' key={post.id} onClick={() => handleUpdate(post.id)}>
                            <p>Title: <span>{post.title}</span></p>
                            <p>Body: <span>{post.body}</span></p>
                            <p>User: <span>{post.userId}</span></p>
                        </div>
                    ))
                }
            </div>
        </div>
    )
} 
Creating DELETE request.
First let’s change the component in src/App.tsx
import { CreatePost, DeletePost, GetPost, UpdatePost } from "./components"

const App = () => {

  return (
    <div>
        {/* <GetPost /> */}
        {/* <CreatePost /> */}
        {/* <UpdatePost /> */}
        <DeletePost/>
    </div>
  )
}
export default App
Then we go to src/components/DeletePost.tsx to create a new functional component that is the same as UpdatePost.tsx . since we need a list of existing posts to be able to delete some.
And now we have the handleDelete function that receives an id and at the moment does nothing.
Note that now the onClick event in each post, executes a function called handleDelete and the id of the post is passed to it.
import { getPosts } from "../utils"
import { useEffect, useState } from 'react';
import { ResponseAPI } from "../api";

export const DeletePost = () => {
    const [posts, setPosts] = useState<ResponseAPI[]>([])

    useEffect(() => {
        getPosts().then(data => setPosts(data))
    }, [])

    const handleDelete = async (id: number) => {

    }

    return (
        <>
            <h1>Delete Post 👇</h1> <br />
            <h2>Click a card</h2>
            <div className="grid">
                {
                    posts.map(post => (
                        <div className="card" key={post.id} onClick={() => handleDelete(post.id)}>
                            <p>ID: <span>{post.id}</span></p>
                            <p>Title: <span>{post.title}</span></p>
                            <p>Body: <span>{post.body}</span></p>
                        </div>
                    ))
                }
            </div>
        </>
    )
}
Then we need to create a new src/utils file named deletePost.ts that inside will have an asynchronous function that will just return a promise resolving a boolean value to indicate if the post deletion was successful.
We just call the delete method of our instance and add the ID of the post we are going to delete.
In that case we have the same properties as when we execute a get, post or put. But the data is useful to us because we would get an empty object, in this case we will evaluate the status code of the request, if it is a status 200 means that everything went well then it would return a true.
import { client } from '../api';

export const deletePost = async (id: number): Promise<Boolean> => {
    const { status } = await client.delete(`${id}`);
    return status === 200
}
Now we are going to use this function in src/components/DeletePost.tsx.
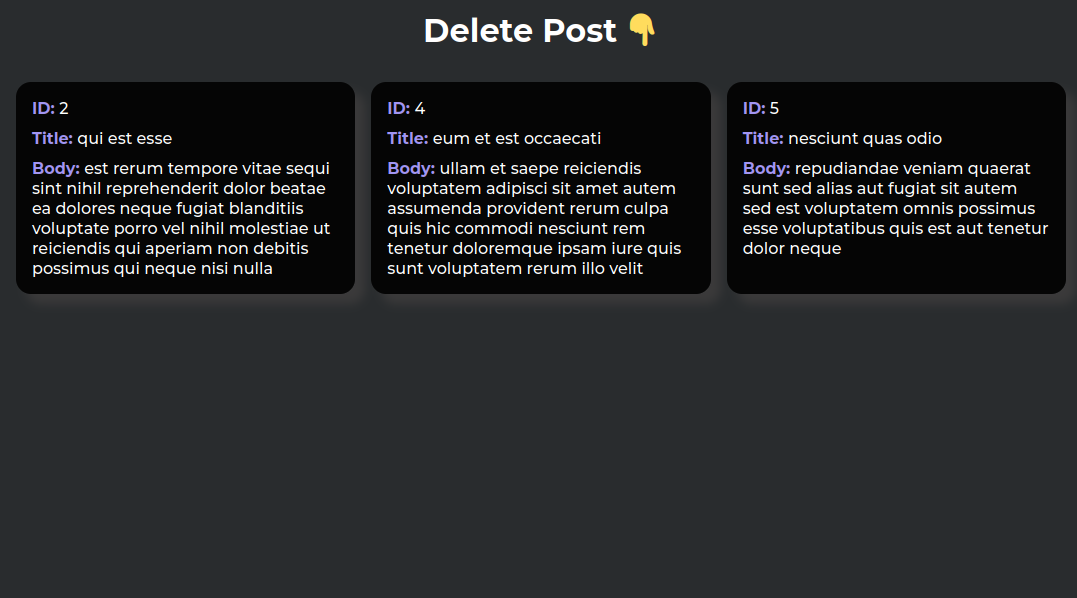
Inside the handleDelete function we execute the deletePost function sending the ID of the post we want to delete, and using async/await we resolve the promise to obtain the boolean value and based on that value, update the state.
import { deletePost, getPosts } from "../utils"
import { useEffect, useState } from 'react';
import { ResponseAPI } from "../api";

export const DeletePost = () => {
    const [posts, setPosts] = useState<ResponseAPI[]>([])

    useEffect(() => {
        getPosts().then(data => setPosts(data))
    }, [])

    const handleDelete = async (id: number) => {
        const isSuccess = await deletePost(id)
        if (isSuccess) setPosts(prev => prev.filter(post => post.id !== id))
    }

    return (
        <>
            <h1>Delete Post 👇</h1> <br />
            <h2>Click a card</h2>
            <div className="grid">
                {
                    posts.map(post => (
                        <div className="card" key={post.id} onClick={() => handleDelete(post.id)}>
                            <p>ID: <span>{post.id}</span></p>
                            <p>Title: <span>{post.title}</span></p>
                            <p>Body: <span>{post.body}</span></p>
                        </div>
                    ))
                }
            </div>
        </>
    )
} 
Handling errors.
To handle errors with axios, just go to our helper functions (src/utils/) and use a try/catch since we have been using async/await .
Inside the try we place all the code we want to execute.
Inside the catch , we are going to receive the error if something goes wrong, for example: error in the request, error in the server, among others. This error that we receive by parameter, we can caste it to a type that does not offer axios that is AxiosError and thus to have the autocompletion.
This error has several properties, but the most common is the error message and the name of the error.
Finally note that in the catch we return an empty array, this is to comply with the contract of the function since we must return a promise type ResponseAPI[].
import { AxiosError } from "axios"
import { client, ResponseAPI } from "../api"


export const getPosts = async (): Promise<ResponseAPI[]> => {
    try {
        const { data } = await client.get('?_limit=6')

        return data

    } catch (error) {

        const err = error as AxiosError
        console.log(err.message)
        console.log(err.name)

        return []
    }
}
Conclusion.
No doubt axios is a very powerful library, although I am not saying that it is mandatory, it is a very useful library that will serve you in some project 😉.
I hope you liked this post and I also hope I helped you to understand how to make basic HTTP requests with this library, an alternative to Fetch API. 🙌
Demo.
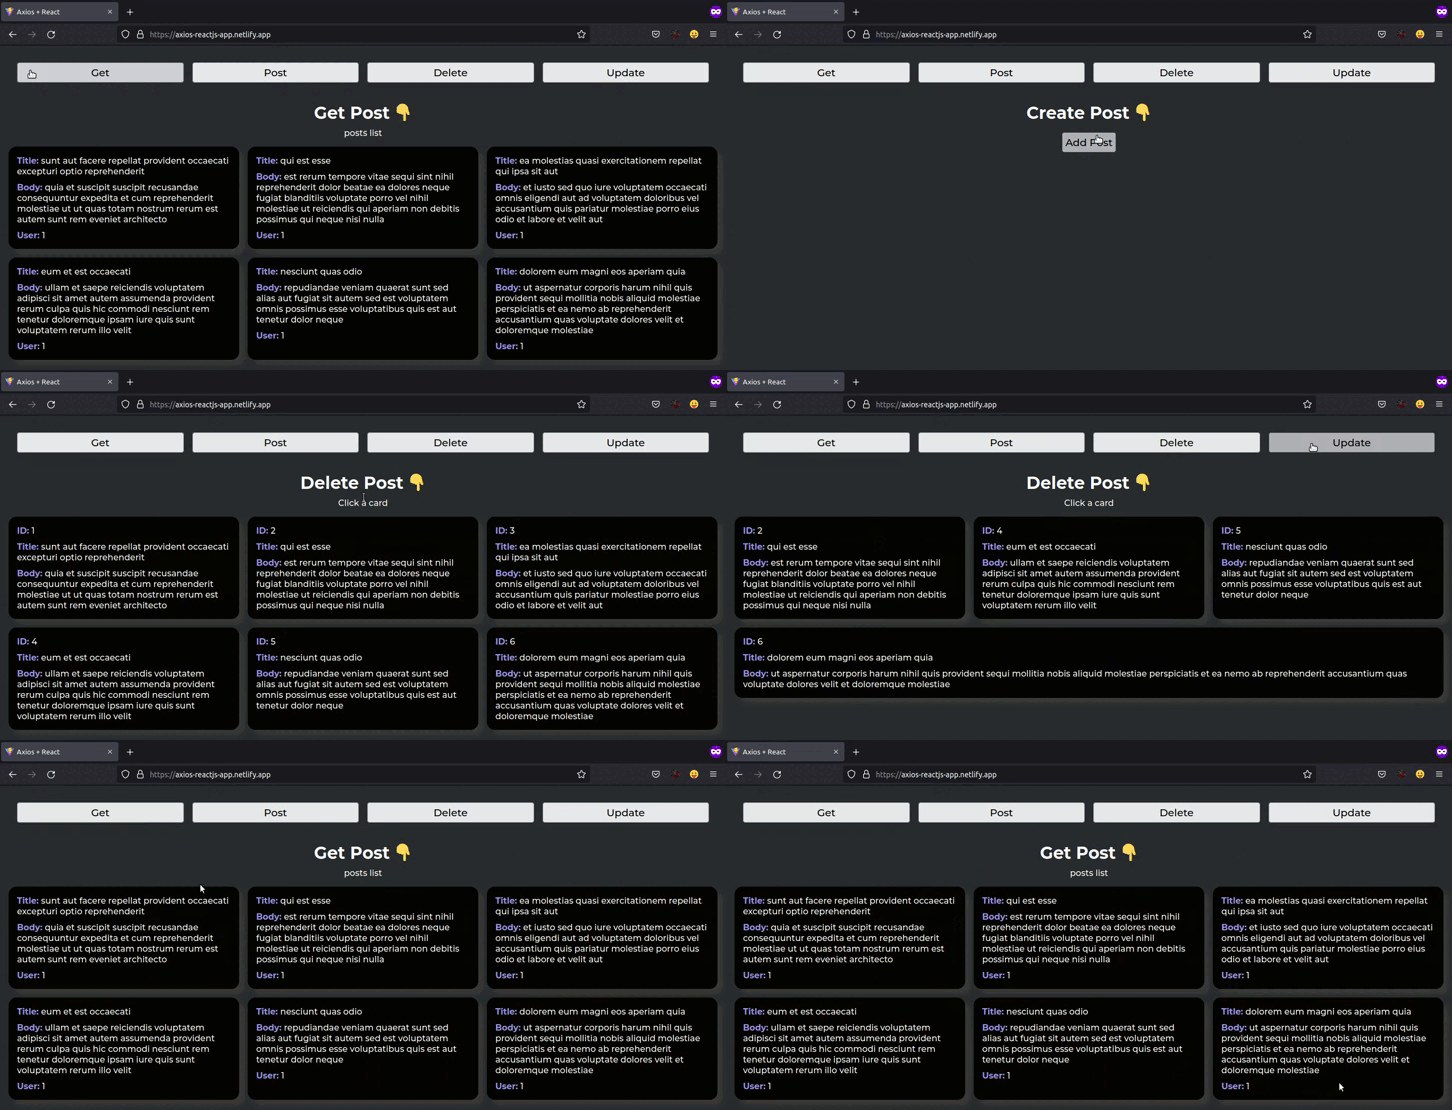
I made some changes to the App.tsx so that you don’t have to go to the code and comment out the component and test each type of request https://axios-reactjs-app.netlify.app/
Source code.
The App.tsx code is a little different, but the rest remains the same.
https://github.com/Franklin361/axios-react
🔵 Don't forget to follow me also on X (Twitter): @Frankomtz030601
⚫ Don't forget to follow me also on GitHub: Franklin361
